Showing posts with label Just Because. Show all posts

Monday, 18 February 2019

Homemaking Mondays: A Reason to Smile


Hello! 
Isn't it lovely that no matter what happens in life, that the Lord can always bring
to mind something that can give us a reason to smile. 
One thing that makes me smile are little notes just because.

 I find that in our society today that little notes give people great pleasure. 
Whether expected (as in a birthday) or just out of the blue.
It doesn't need to be handmade or fancy.
Just the knowledge that someone took time out of their life for you.

I was talking to a sweet older Christian lady that I know.  
She isn't able to get out and see people as much as she used to.
She says that just little phone calls or notes in the mail 
cheer her heart so very much. 


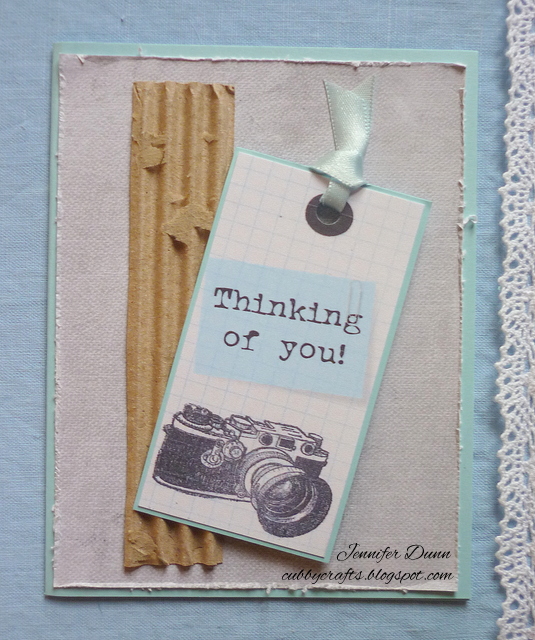
I got one of those sweet out of the blue cards in the mail from a friend this week.
Just to know that I was thought of and that she took the time to send me this note 
made me feel very loved and cherished.  

Do you take the time to let others know you are thinking of them? 
Perhaps it is a shut in or elderly person that you know could use the encouragement.
That they know they are not forgotten. 

Or really anyone could be blessed by the simple act of being sent a note, a phone call, a card. 
Are you willing to take the time to do that?
To add this simple act to your homemaking day?
If you do, it will be greatly treasured and appreciated. 
Just a little simple act of kindness.

Love and Prayers,
Jennifer


Wednesday, 20 June 2018

Some Sweet Purple


Hello!  
Today I'd love to share with you a card and shawl that I made for an old friend.  

She loves purple so I made the shawl in three shades of purple and 
I made a card with lots of shades of purple as well.  

The card has just a few delicate lacy touches underlaid by fun polka dots.

I made this shawl for her as a hug across the miles. 


I used the same pattern as the blue mix that I made...very nice pattern to work with!  
Here is a link to the PATTERN!
I couldn't find any variegated purple yarn that I liked, so I just picked out three different shades and made layers. 


For the last row, I just did a single crochet 2x and then a picot.  
This gave it a nice wavy edge.  


Thanks for dropping by! 
Jennifer


Monday, 12 February 2018

Surprise Tea


Hello!  Today I have a special surprise tea I made up for my children today. 

My girls were downstairs doing school lessons and painting. 
So I made up a tray of tea and little cookies for them.  

I took the girls tea down on the tray and they were pleasantly surprised.  

Once I came upstairs, our dog seeing I didn't have the tray with me went down to join in the treats. 
~smiles~

Of course the boys and I wanted tea as well so I made up a pot.  


I laid out a doily placemat on my silver serving tray.
I added a tea cup for one daughter and tea mug for the other. 
A jar of cane sugar and a plate of cookies. 
I don't usually allow sweets in the morning but thought it would be fun today. 


I have discovered this chuck cane sugar at the store in the bulk bins.  
I have mixed feelings about bulk bins, but when you have to turn a lever it's better then having the bins open for "anything" to get in there. Just a thing of mine. 


I found this sweet Royal Albert China plate "Birch Trees" at the free store. 
It's perfect for little treats like these. 


I used my Country Lane tea cups for most of us, and the little Switzerland tea spoon. 

Then I pulled out a tea mug for my eldest daughter who isn't a huge fan of the dainty tea cups.


We had some Jasmine Green Tea that we recently discovered through a friend.  

It is a nice delicate floral tea, and with a touch of sweetness it is now one of my favourites.


Thank you for dropping by!  
I hope you are having a lovely day, and perhaps a nice cup of tea.


Monday, 23 January 2017

Doily For You


Hello! Nice to see you again!  Today I have a card that I'd like to share with you.  It was fun to get out some ink as well on this one.  

I found some pretty papers by K& Company, some soft beige lace, some green ribbon and a burlap flower and button.  

On the front panel I inked a sweet lacy wild grass stamp and a sweet sentiment from Tina Wienke.  Something simple for someone I have been thinking about.  

Below is a new doily that I made from a pattern called White Fan Doily by Beth Mueller.  I made it in red and I think it turned out quite striking. 


Thanks so much for dropping by!  Praying you have a wonderful day!

Sharing with Word Art Wednesday and The Art of Homemaking Mondays.


SaveSave

Monday, 14 November 2016

Shoregirl's Tag Cards


HI!  Today I have some special cards to share with you.  I follow Shoregirl's Creations and she makes some amazing things.  One of them are printables.  The three tags I've used are from her and I started by making just one card to enter a contest on her blog for some free tags from her Etsy shop.  :)  You can find the giveaway post HERE!  Then, well...I got carried away. hehehe

For each of the tags, I made two cards.  Using bits of ribbon I had in my stash and some papers that I had that I'm not sure who they are by.  Have fun scrolling down to see them all.


Thanks for scrolling down to see all the cards.  It's a great giveaway so I encourage you to pop over to see her blog and check it out.

Sharing with Word Art Wednesday.


SaveSave

Thursday, 3 November 2016

Butterfly Cards


Hello!  Today I have some more cards to share with you.  I love having simple cards tucked away for when I need them so that I am not scrambling.  Better creativity that way I find...if I'm not rushed.

I have used some prepackaged material by Forever in Time, and then added some simple lace/ribbon and flowers from my stash.  The sentiments are each from odd sets that I have lost the creators name from.  But I love them!

So you have a stash of ready made cards? or are do you work better under pressure. :)


Praying you have a beautiful day and are able to create some cards for fun.  A little bit of a treasure to give to someone when the opportunity arises.

Sharing with Word Art Wednesday. 


Friday, 2 October 2015

Embroidery Hoop Storage


Hello! Yes, It's me again. hehehe I'm loading you all down with posts this week.  I hope you are all having a beautiful day!  Today I'd like to share with you a fun project that I have been itching to do.  I saw a picture of it posted somewhere and I though it was just the perfect way to store my crochet needles and then other items as well.   


I have different sized embroidery hoops that I already had some fabric in from a display I did at the last place I lived.  Thus far since moving they'd just been stacked away in a safe place.  So I was already partly there.  Now I have my hoops hung up with those non-marking hooks on the wall in my sewing/ craft area.


What follows is a bit of a tutorial on how I made my hoop storage thingy's if you'd like to see how I put them together. :)  Hope it's clear enough for you to follow easily.

First pick out some material you'd like to use.  I had just a couple different ones, but you could use the same kind or three different ones....you choose.


I cut a piece to fit the whole hoop, and one to fit about 2/3 of the way over top.

Then using a good hot iron, baste the edge of the overlapping fabric down on the one side.  ( I use about a 1/4- 1/2 inch myself.)  That way it won't unravel on you.  Then sew along the basted line to keep it in place.

Then set the material over the larger piece and pin it together in the desired place.   Then you need to sew some vertical lines  to make your pouches.  You can add as many as you'd like and in varying widths.  I just eyeballed mine, so they aren't all the same. LOL


The next step is to add a smaller band or ribbon.  This is to keep all the items you're storing at the same level.  If you make a band, you need to remember to bast it under and then sew it down on each bast line so that it's secure.  When I used the ribbon, I just used one sewed line for it.


Now it's time to put it on the hoop.  Lay the material over the inner circle and secure with the outer circle.   Final step is turn it over and cut off the excess material.  


Voila!  You're done.  Now you can fill it and hang it up in a convenient spot. :)


Thanks so much for dropping by and I pray that you enjoyed the tutorial.  It's always fun to try new things, and to create things that are not only functional but pretty!

Sharing at Art of Homemaking Mondays.


Wednesday, 24 June 2015

Them that Fear Him


Praise God that he is close to those who seek after him and love him.  The Bible says that the fear of God is the beginning of wisdom.  The salvation that God gives is incredible!  He completely cleanses us from all sin (past, present & future).  Does that mean that once one is forgiven that they'll never sin again? No, it means that our sin is covered and will not be held against us when we stand before the judgement seat of Christ.  How amazing that is!  If only we will repent and believe the gospel.  That Jesus died on the cross for our sin, shedding his own blood to pay the penalty for sin; that he was buried; that he rose again on the third day in the flesh; and that he ascended up into heaven where he is right now.   The Lord Jesus Christ is not dead but alive and is able to forgive your sin like he has mine! Praise God for his amazing grace to us that if we call on the name of the Lord he'll save us.


For my card today that I've created for Word Art Wednesday I've used this wonderful free word art provided free! (and you can grab it to). I've layered it over some lovely paper and added a few crocheted flowers I made with pearls for their centres with a touch of lace.
Do pop over to the Word Art Wednesday challenge blog to get some wonderful inspiration from not only the wonderful design team but from the other entrants as well. Also there is a wonderful devotional to read as well.


Wednesday, 17 June 2015

Planted by the Waters


Hello!  I have a card to share with you today that I created for the wonderful Word Art Wednesday challenge. It's anything goes with a free word art that you can snag if you would like.
I found some misc papers in my stash, and I loved the swirly paper so that's the water, and a die cut tree that I was given a long time ago I found in my stash.  Then I added some great buttons to the side.  Simple yet I didn't want to distract from this scripture.
When one is planted by the living waters of God's Word they won't suffer when trials come but will find their source of strength in the Lord and His Word.  Neither shall cease from yielding fruit...how powerful that is when you understand plants.  Any disturbance can cause a plant to stop producing fruit, and yet when the life giving source of a plant/ person is the Lord Jesus then there is no interruption in fruit bearing.   Bearing fruit= good works.  May we who know the Lord Jesus and who live by God's Word continue to bring forth good fruit for the glory of God!

Praying you all have a lovely day, and do come join us at Word Art Wednesday if for no other reason than to read the wonderful devotional and see some great inspiration. :)

Tuesday, 9 June 2015

Daisy!


Hi Friends! I love flowers, and this little flower card that came with a decorative paper set I found is lovely!  I added some lace and ribbon in the background over some misc papers I had in my stash.  Then I added some sweet little cream and white paper flowers and a couple crocheted flowers as well.  Then I added some yellow rhinestones to their centres.  So simple yet it makes me smile and I hope the lady I'm sending it to will smile to.

Praying you are having a lovely day and are able to pause in your day to see flowers and to wonder at the incredible designs that God has created in them.


Monday, 29 December 2014

A Quaint Little Set


Hello! I've another sweet little set to share with you all.  It's made with another set of images from Ephemera's Vintage Garden.  I think these sunflower and chicken images are so quaint.  I love the overlapping stamping.
I used some sweet My Mind's Eye papers and some satin black ribbon.  They're simple but will be easily mailed.
Enjoy peeking at them. Hope you have a wonderful crafty day!


Monday, 24 November 2014

A Couple Just For You


Hello Friends!  Today I have a couple of cards that I've made just because.  I needed a couple cards to send to a couple ladies just because and so I put these together.  The top one I used an image that I had found free online ( if you know where it's from do let me know so I can give credit).  I layered it up and added a lovely ribbon that added a soft touch and yet didn't take away from the lovely backdrop.  


Here I have a card that I put together with some lovely papers and a piece of a doily.  I added the touch of ribbon for her to have a place to sit.  She's a lovely girl from Anna Stillwell at Cuttlebug Cuties.    I love many of the sweet girls that she draws.  This girl reminded me of the lady that I coloured her up for.  I tried to colour her to compliment the papers.  The sentiment is from Create with TLC crafting blog.  

Thanks for dropping by!  It's so nice to be able to share my creations with you!
Sharing with Word Art Wednesday.