Thursday, 22 October 2015
Homestead Apron and Apple Treat
Hello Friends! I have an apron to share with you. A friend of mine gave me this lovely homestead fabric and I thought that since she was moving into a new home and into a new kitchen I'd make her something new to wear in it.
I added some little eyelet style lace to accent it along with the two pockets.
I have also tried to make these sweet apple flowers with a butter pastry bottom. I must say that it's not my thing to get them to roll nicely. But.....they tasted so very yummy! I will definitely use these ingredients, but in a different shape next time. :) I do need to learn to make my own butter pastry. Any tips?
Sharing with Art of Homemaking Mondays
Monday, 19 October 2015
A Couple Cute Snowman Cards
Hello Friends! Today I have something a bit different to share with you. This week From the Heart Stamps put out this very adorable little snowman stamp set and it was on sale at the store HERE for just $1.00. So I had to grab it. It's very fun to colour up and every time I see it I smile. :)
With having a new one of Faith's images I also wanted to play along in one of the challenges on the FTHS blog. It's a sketch challenge with a twist. So I followed the sketch and added the twist which was stitching. It's a bit hard to see in the pic, but you can click on it and see it bigger if you'd like to.
I used my Spectrum Noir markers to colour with and I used My Mind's Eye papers as well.
Since it was so fun to play with I made another card right afterwards. I had printed out a few of these sweet snowmen in two different sizes. For this card below I also coloured the image with my Spectrum Noir markers and used My Mind's Eye papers and pre-made card base.
Thanks for dropping by to see me. :) It was nice to play with paper again.
Praying you have a beautiful day!
Monday, 12 October 2015
A Butterfly Birthday
Hello! Today I have a card to share with you that I made for a sweet friend of mine. She lives far away so this is a birthday greeting that fluttered her way.
I used a My Mind's Eye decorative card base and added some papers from My Mind's Eye, a doily piece some ribbon and a cute pre-made flower. I stamped the sentiment over the butterflies.
Something simple to fit in an envelope to fly over the ocean.
I hope you are enjoying the day! Here in the Yukon, the sun has come out of the clouds and the wind has changed directions...winter is on it's way. :) God is so good and orders things just as they should be.
Sharing with Word Art Wednesday.
Friday, 2 October 2015
Embroidery Hoop Storage
Hello! Yes, It's me again. hehehe I'm loading you all down with posts this week. I hope you are all having a beautiful day! Today I'd like to share with you a fun project that I have been itching to do. I saw a picture of it posted somewhere and I though it was just the perfect way to store my crochet needles and then other items as well.
I have different sized embroidery hoops that I already had some fabric in from a display I did at the last place I lived. Thus far since moving they'd just been stacked away in a safe place. So I was already partly there. Now I have my hoops hung up with those non-marking hooks on the wall in my sewing/ craft area.
What follows is a bit of a tutorial on how I made my hoop storage thingy's if you'd like to see how I put them together. :) Hope it's clear enough for you to follow easily.
First pick out some material you'd like to use. I had just a couple different ones, but you could use the same kind or three different ones....you choose.
I cut a piece to fit the whole hoop, and one to fit about 2/3 of the way over top.
Then using a good hot iron, baste the edge of the overlapping fabric down on the one side. ( I use about a 1/4- 1/2 inch myself.) That way it won't unravel on you. Then sew along the basted line to keep it in place.
Then set the material over the larger piece and pin it together in the desired place. Then you need to sew some vertical lines to make your pouches. You can add as many as you'd like and in varying widths. I just eyeballed mine, so they aren't all the same. LOL
The next step is to add a smaller band or ribbon. This is to keep all the items you're storing at the same level. If you make a band, you need to remember to bast it under and then sew it down on each bast line so that it's secure. When I used the ribbon, I just used one sewed line for it.
Now it's time to put it on the hoop. Lay the material over the inner circle and secure with the outer circle. Final step is turn it over and cut off the excess material.
Voila! You're done. Now you can fill it and hang it up in a convenient spot. :)
Thanks so much for dropping by and I pray that you enjoyed the tutorial. It's always fun to try new things, and to create things that are not only functional but pretty!
Sharing at Art of Homemaking Mondays.
Thursday, 1 October 2015
Keeping My Finger's Busy
Hello! Thanks for dropping by to see me. I've been trying to keep my fingers busy. I am one of those people who isn't happy doing nothing very often. :) So these are a few of the things that I've been doing to keep busy. My inspiration for this comes from:
Proverbs 31:27 - She looketh well to the ways of her household, and eateth not the bread of idleness.
Above are some preserves that I canned and made these crocheted doilies to top them with as gifts. Then they can use the doily and enjoy what's in the jars. Here's the link to the TUTORIAL I used. They're easy to tie onto the jars with twine or ribbon or whatever you think looks pretty. :)
Below is a crochet project I did. I used that big chunky yarn for the first time and it's so nice to work with! It's soft and warm and so I made a blanket, a hat and then a doily out of the remaining yarn.
I had my birthday this last month, and a dear friend gifted me with some beautiful blue yarn for a scarf. I followed the pattern on the packaging and it's oh so nice! It will most definitely keep me warm this winter!
Then I've also been back at making some aprons. I think it's about my most favourite thing to sew. :) I found this material at the free store (in the recycling centre) in town and thought it would make a lovely apron. Below is a close up of the fabric, and I used two kinds. Then for a finishing touch I added some blue lace around the bottom. I made the straps extra long since I saw a style where they wrapped them around themselves and tied them in front. So something I've not done before, and hope that whomever receives them will be pleased with. I made two of these just alike.
I also love to make aprons out of clothing that I find. Below was a Gap sundress I found at the free store and it only needed a few mods to become an apron. I love the bright cheerful colour this one has.
Well, these are a few of the things I've been doing aside from the regular mending and altering of clothing. I'm not a great seamstress, but thankfully the Lord has given me an ability to manage.
So, what have you been up to as you keep your finger's busy?
Sharing this post at The Art of Homemaking Mondays.
A Beautiful Fall
It's been a beautiful fall time here in the Yukon. Sorry it's been so long since I've posted....it seems like I just posted, but whoosh....it's weeks later. The Lord Jesus has been so good to us and has been blessing us each day.
I do hope you're all been enjoying the fall time where you're at. We've been doing lot of putting food by. We made lots of apple sauce and froze some then canned the rest. We also made a lot of salsa and froze it in little tubs to. I've just learned more about how to freeze food in mason jars...so I'll be doing more of that in the future as I would love to live without more of this plastic. :)
We went low bush cranberry picking a few times and have made lots of jam and froze the rest.
With going berry picking we've been out enjoying nature to. My kids love this natural "golf course" and we've been exploring around it.
One thing I have been enjoying is this food processor for my Bosch machine that my husband bought me for my birthday. :) It sure makes short work of grating carrots for carrot cake and also shredding cheese for pizza.
We've been making lots of cookies and freezing some. Although I think that the freezer has been emptied of cookies at this moment. LOL I'm so glad that I can make four batches easily in my mixer.
We've been trying to keep our flowers alive as long as we can. There are still some pansies and sweet peas that haven't totally frozen off, and I've been bringing little bouquets inside and putting them on my desk. I love the smell of the flowers when they warm up. :)
Today our wood order arrived and we all got to work right away and it's now all stacked nicely in our woodshed. All ready for winter. I love how wood heat warms everything all the way through. Off to the right in the picture I have a bunch of wood from last year left over that's split...when that's been used, I'll start splitting the new stuff. That's one job I've always enjoyed since I was a young teen. I love the smell and feel of the wood...not to mention it's good exercise.
I do hope you have a wonderful day and are counting the blessings that the Lord Jesus Christ brings into your lives.
Thanks for dropping by! I'm sharing this post with The Art of Homemaking Mondays.
I'll be posting some more things, so do pop by again. :)
Friday, 4 September 2015
Flower Cards
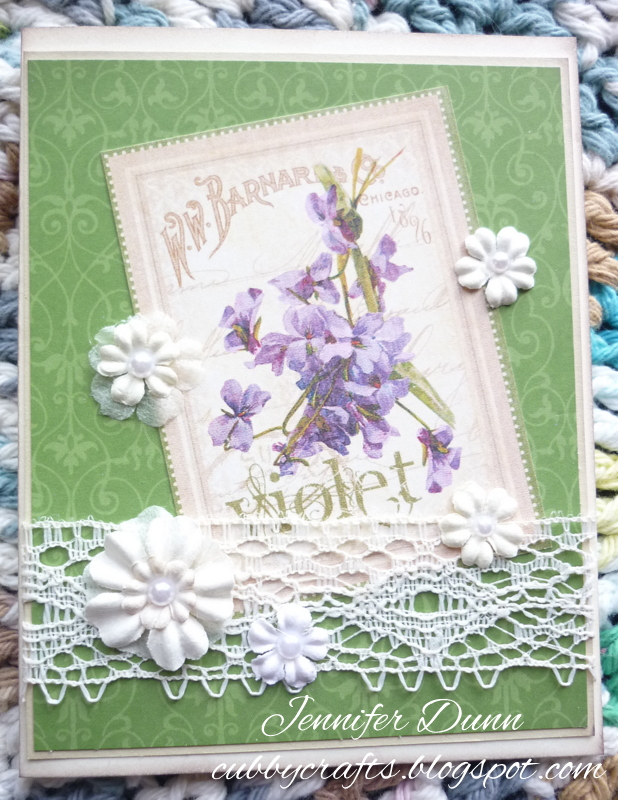
Hello! Today I'd like to share with you some cards that I made for a dear friend. They are simple and can easily fit into an envelope. They have some of my favourite elements, pretty papers, flower images (from a paper set I've had awhile), lace and cut flowers, with a touch of pearls. I've not added any sentiments so that they can be used for any occasion.
This card below I made for her and added a sweet birds nest image from Shoregirl's Creations. Then some papers from my stash and the same lace and flowers I used on the other cards. I love how these flowers layer so well. With a touch of distressing and some added inking around the edges of the papers for a finishing touch.
What a blessing that God has created all this beauty for us to enjoy. His creation greatly inspires me!
I'm sharing this card with Word Art Wednesday.
PS. I put up some other posts so do scroll down to see what else I've been up to. :)
Subscribe to:
Posts (Atom)