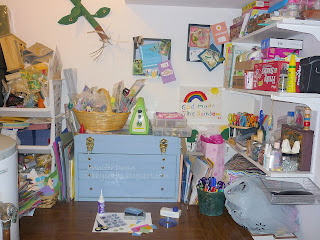
Hello, today I have a tutorial to share with you. It's about how to make some of your own buttons. If you're anything like me, I collect buttons and have tons of the "real thing". But just for fun I thought it would be nice to try to make some of my own buttons. Please come step into my crafty spot with me.
Seems a bit crowded, but that's ok, you'll all fit! Now to prepare.
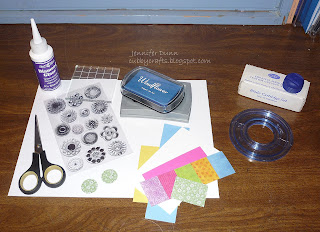
You'll need some stamps if you're like me and drawing one is out of your league. I'm using some clear ones from Fiskars, but any small ones will do (Digi or rubber) . Mine aren't button stamps but we can tweek them a little. Then some ink if using rubber and a mounting block if they're clear. Some pieces of paper; I chose various colours and some patterned ones. A pair of scissors and a cutting tool if you have one (I'm going to use my Creative Memories one for the patterned paper.). I have a circle punch on my "love to have" list. But a pair of good scissors is great! And of course some dimentional adhesive like Chrystal Laquer. I'm using Diamond Glaze by Judikins. For safety, an extra piece of paper or newsprint is always a good idea!
Now that I've cut out some patterned circles and stamped a few "buttons" it's time to add the glaze. If you want distinct "holes" then you can add those with a marker prior to glazing. For those using punches and not scissors, you will need to punch them out prior to glazing them because with the glaze they won't fit in the puncher. Note: go slowly with the glaze to reduce bubbles. If you end up with some bubbles, just use a needle and pop them.
Here's a bit of a close up of some of the buttons with the glaze. It looks milky at first, but will dry nice and clear. Another note, with the precut circles/ punches you could add a bit of sticky tac under them to keep the paper from warping while the glaze is drying. Drying times will vary.
Once they are all dry, go ahead and cut them out, with the good ol' reliable scissors if you didn't precut/punch them. Pauline calls it fussy cutting, and I've a mind to agree with her there! Once they're all cut out it's time to add them to your creations! Here's what I've come up with.
I love baskets of buttons so I made my own. The basket I wove from some embossed paper and filled it with "buttons". Some I sewed and others I just adhered. Then I added some bling flourishes and sweet little butterflies. The butterfly wings are glittery but it doesn't really show in the photo. I added a bit of ribbon and a sentiment from Inkadinkado that I stamped right on the basket.
Here's a close-up of the delightful buttons. They're very easy to make and it's nice to be able to custom make them for select projects where no other buttons seem to work. Hope you enjoyed this little tutorial. Have a marvelous day and enjoy your buttons!
I am also entering the challenge over at Scrapbook Sisters -anything goes with this card.


3 comments:
Great tutorial, Jennifer! Your basket of buttons is fabulous!...Nancy :o)
So fun and cute! Great idea!
Clever idea, Thanks for sharing
Hugs Julie P
Post a Comment